
Red eyes ruin the photos. We all must have seen the red effect inside the pupil while taking the pictures. You might be finding a way to remove red eye in the photos, but looking for a tutorial?
If yes, then this article help you get rid of red eyes for free.
Before we jump into it, let’s understand some basics first.
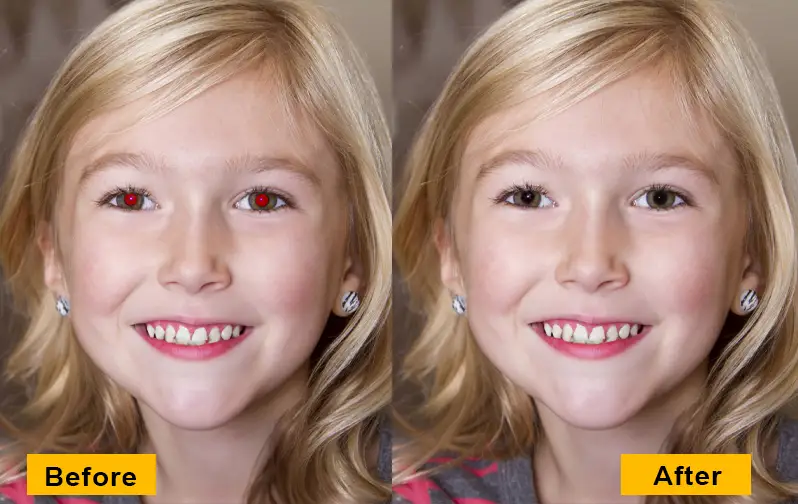
Table of Contents
How do the Red Eyes Occur in the Pictures?
The occurrence of red eyes in photographs is a common phenomenon known as the “red-eye effect.” This effect occurs when the camera flash illuminates the subject’s eyes in low-light conditions. The primary cause of red eye is the reflection of light from the retina at the back of the eye.
When the camera flash is fired, the light enters the subject’s eye and passes through the pupil, reaching the retina. The retina, which is rich in blood vessels, absorbs some of the light but reflects a portion of it toward the camera. This reflection appears red or orange due to the blood vessels’ color.
How to Eliminate Red-eyes in the photos?
There are few hacks you can do to stay away from red-eyes in the photos:
1. Adjust the lighting: Use soft, diffused lighting.
2. Avoid direct flash: Try to avoid using direct flash whenever possible.
3. Bounce the flash: If you must use flash, try bouncing it off a nearby wall or ceiling.
4. Increase the ambient light: Increase the overall lighting in the room to dilate the subject’s pupils.
5. Use an anti-red-eye feature: Many cameras have a red-eye reduction feature that emits a series of pre-flashes.
6. Position the subject properly: Have the subject look slightly away from the camera.
7. Use a polarizing filter: Attach a polarizing filter to your camera lens.
8. Capture photos in natural light: Whenever possible, take photos outdoors or in well-lit areas where the need for flash is minimized.
9. Edit the photos: If red-eye still occurs in some photos, you can use photo editing software or apps to correct it.
How to Remove Red Eye in Photoshop?
There are two methods to fix red eye in Photoshop, and both methods are easy to apply.
Let’s see the first method:
Method 1: Fix Red Eye in Photoshop Using Red Eye Tool
Step 1: Open the image in Photoshop and right-click the mouse on “Spot healing brush tool” to open up more tools under it. In the last, you will find “Red Eye Tool”, So select that.
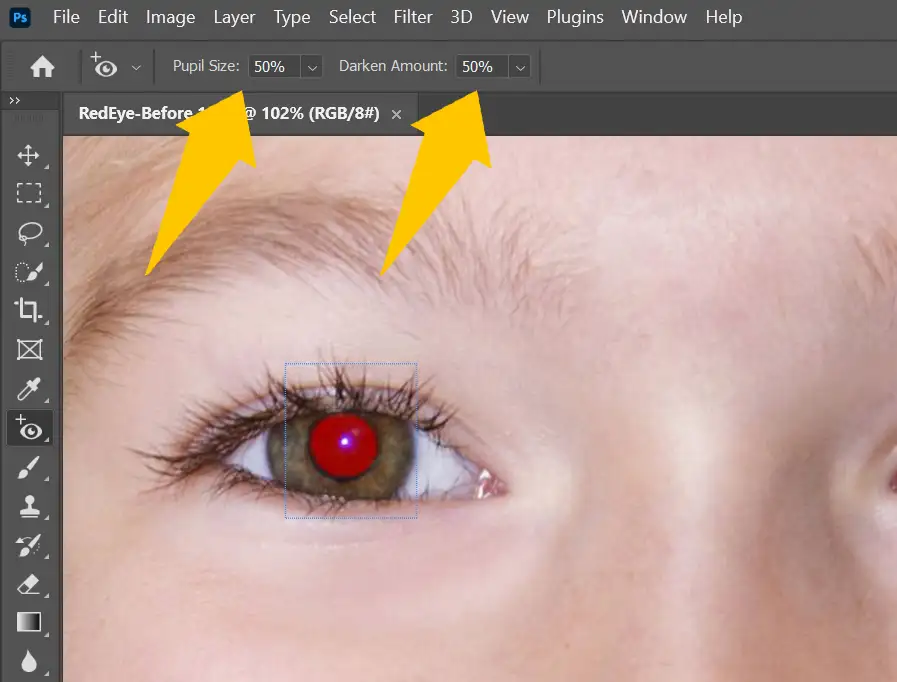
Step 2: From the tool’s properties panel, set the pupil size & darken amount to 50%.
Step 3: Now, create a square-shaped selection around the red eye.
To do that, click and hold the mouse button, then drag it to cover the desired area, making sure the pupil is inside the square.
Once you’re satisfied with the selection, simply let go of the mouse button to finish.
Do the same with both eyes.
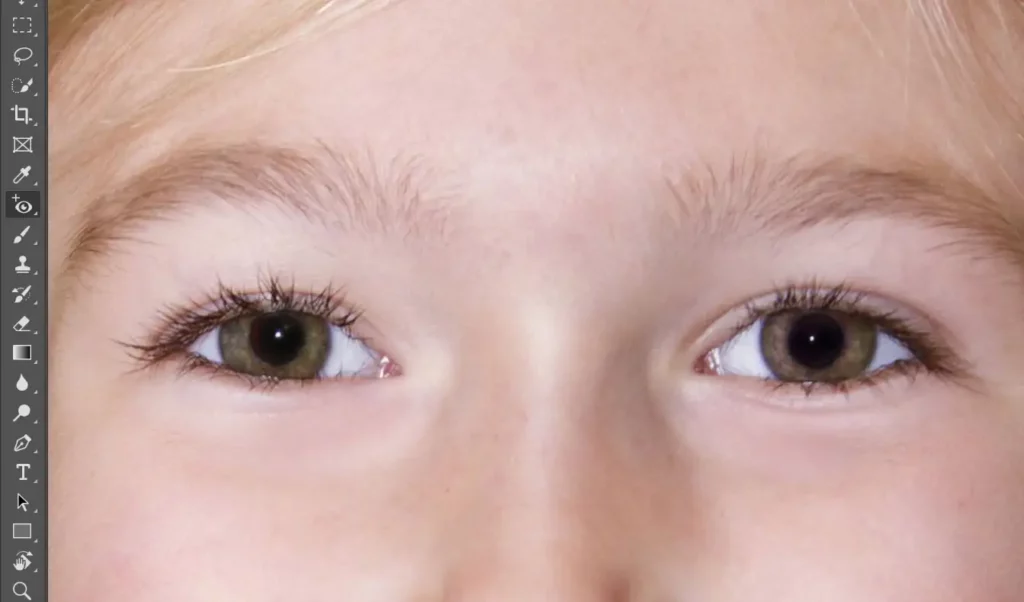
You will notice a big difference in the eyes.
Lastly, export your image to save your work.
This was the first and easiest method to fix red eye in Photoshop.
Despite using artificial intelligence, Photoshop manages to produce remarkable results that exceed expectations.
Now, let’s move toward the second method.
Method 2: Fix Red Eye in Photoshop Using Brush Tool
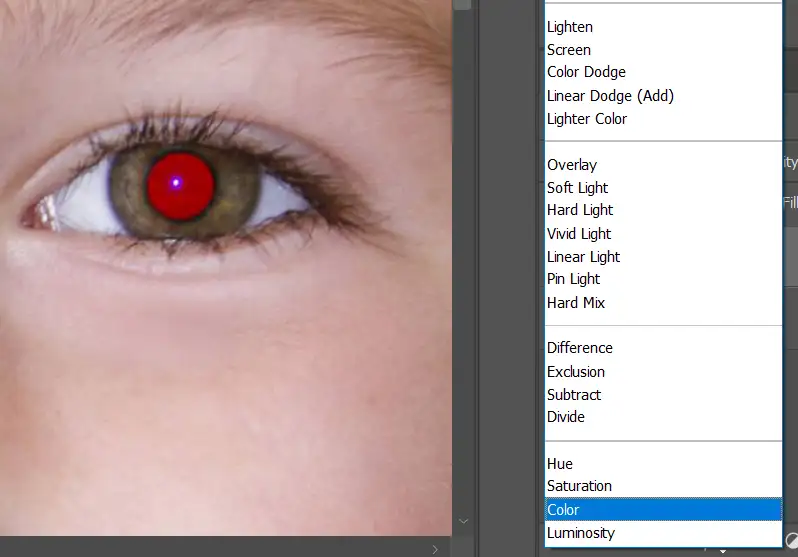
Step 1: Add a brand-new layer and change its blending mode to “Color”.
Step 2: Select the brush and set the size according to the eye size in the photo. Then copy the settings further.
Set the Hardness to – 90%.
Keep the Flow to – 100%
Keep Smoothness to – 0%
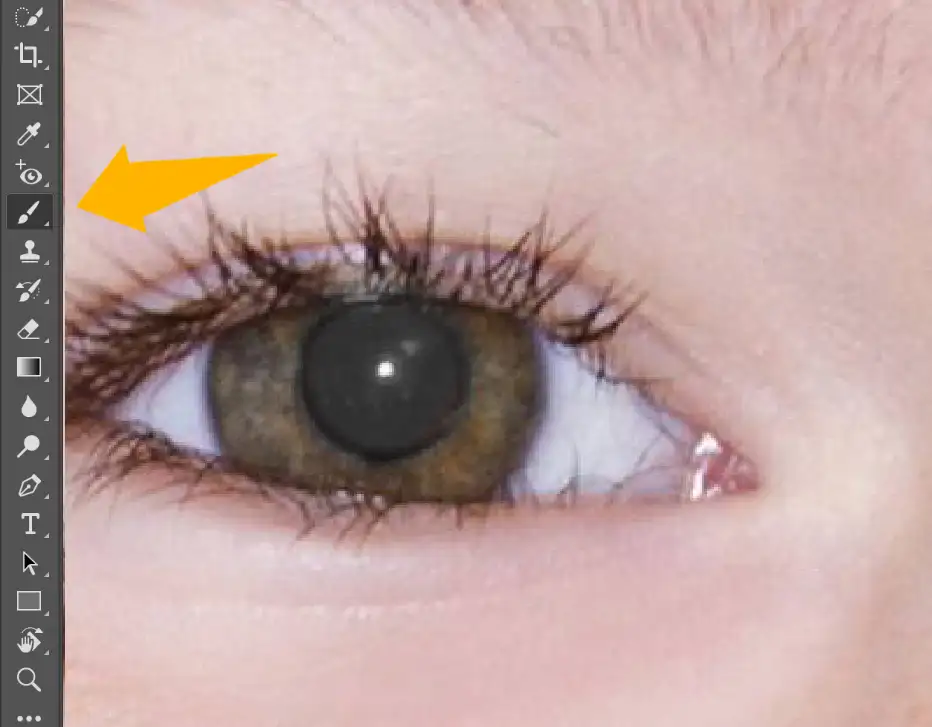
Step 3: Zoom in to the photo and set the foreground color to black. To do that, press ‘D’ on your keyboard.
Step 4: Start painting the eyeball with the brush slowly and gradually.
That’s it! This was the second method of red eye removal Photoshop tutorial.
How to remove red eye in PicsArt?
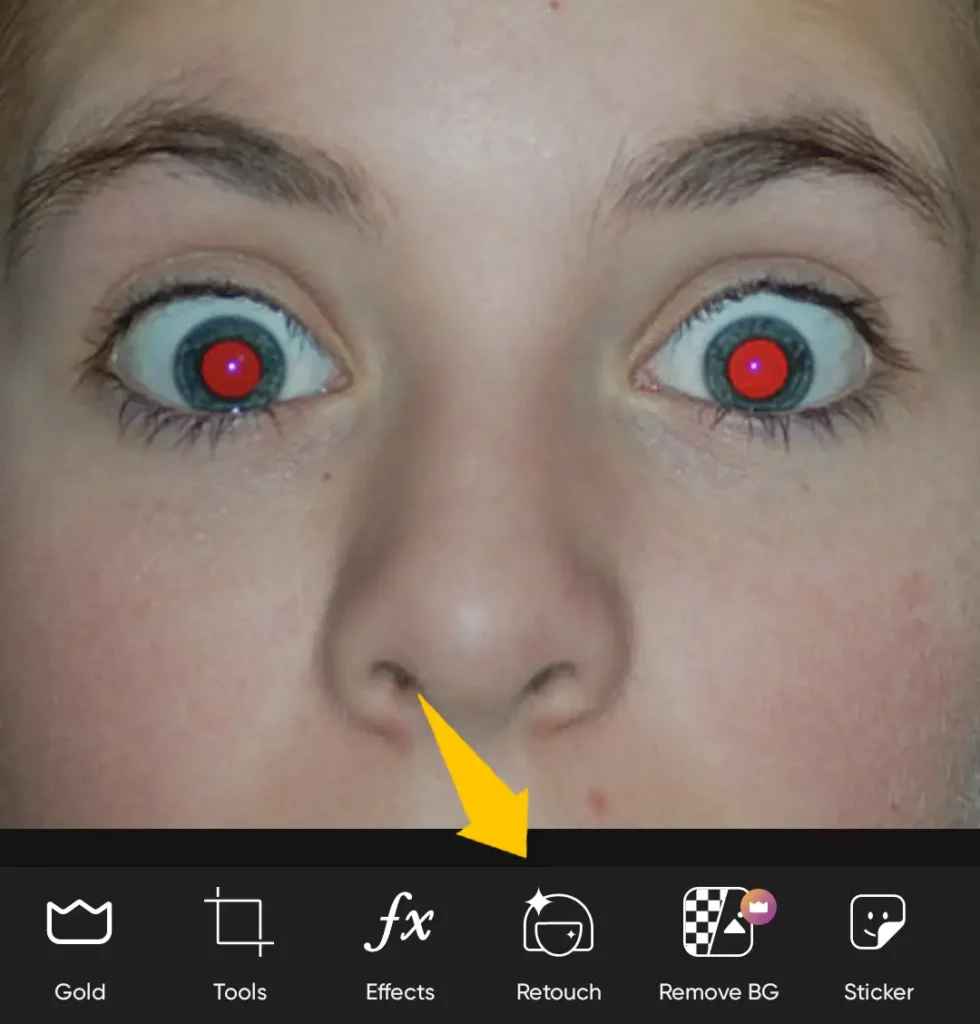
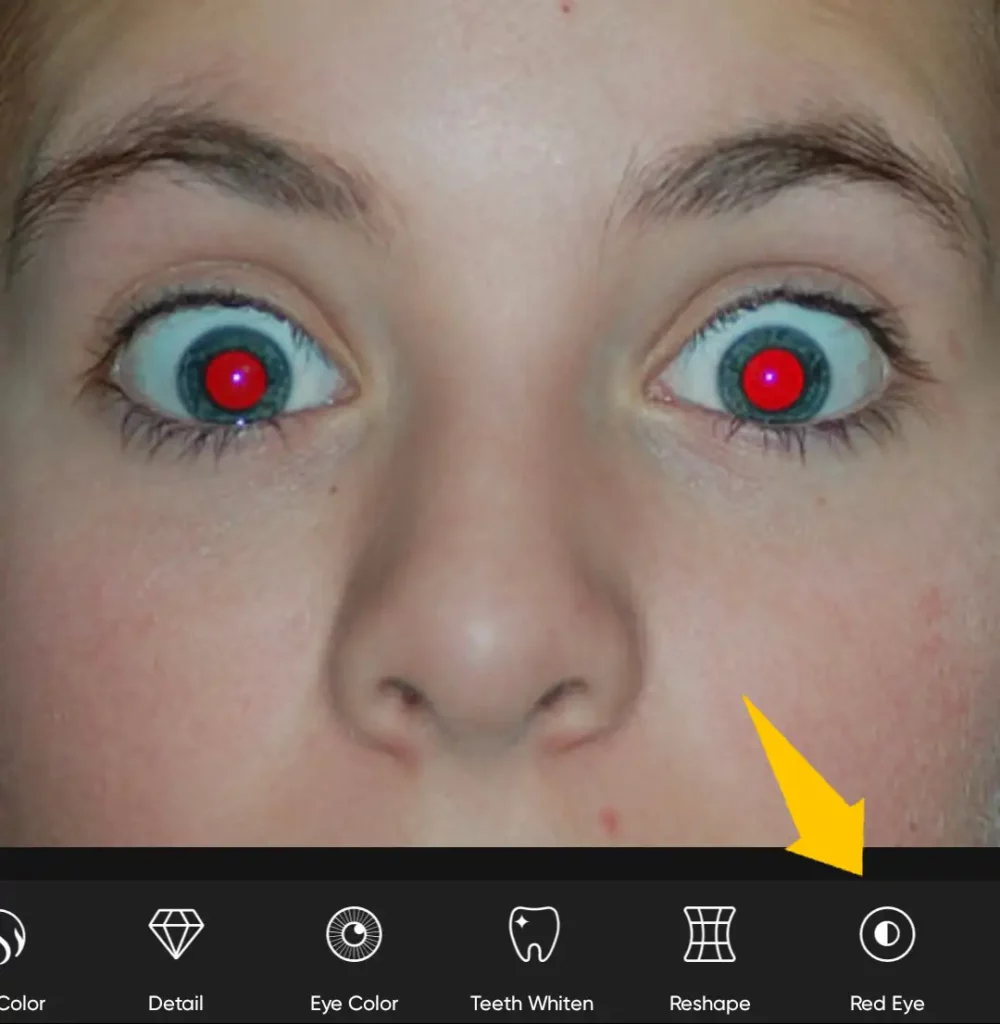
Step 1: Open the PicsArt app and add the photo you want to edit. Tap on the “Retouch” tool and slide to the rightmost option, and select “Red eye”.
Step 2: It will automatically detect the eye location, but you have to fit the pupil perfectly inside the circle.
Step 3: Tap one circle at once and drag to reposition. Also, you can pinch the circle to adjust the position.
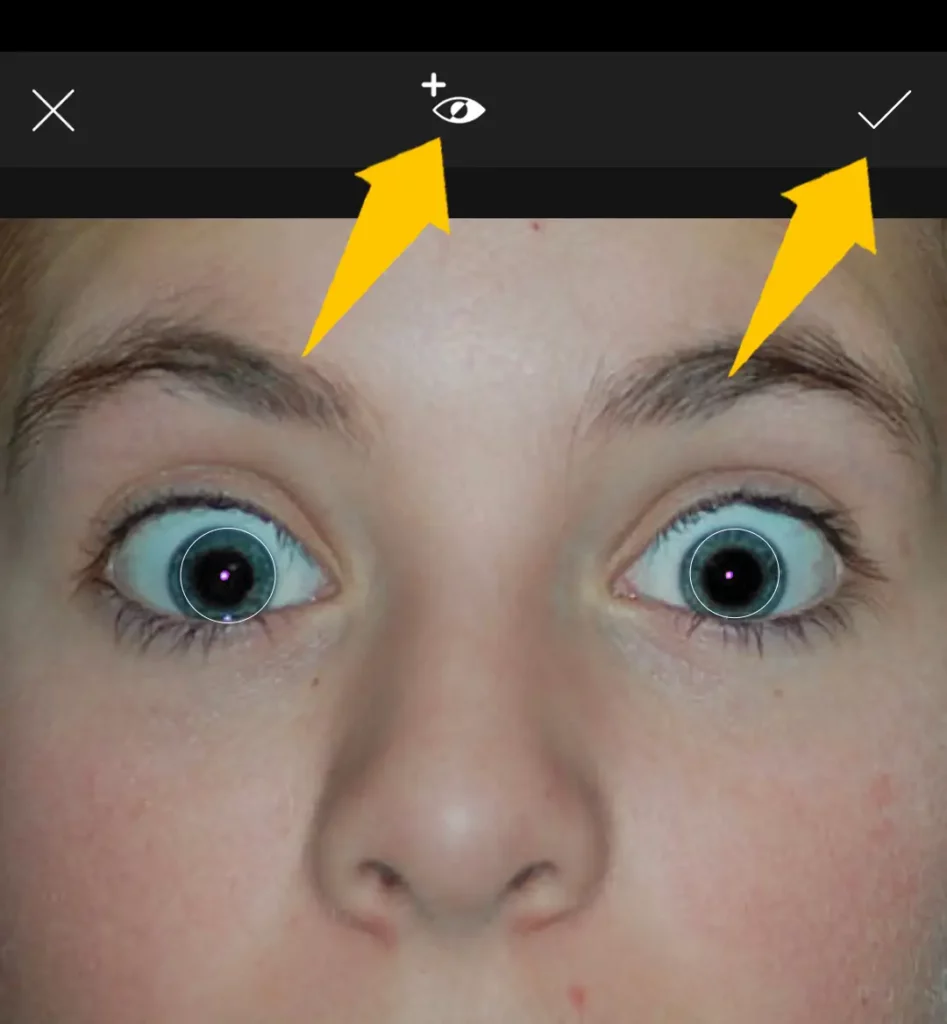
It is done! Now save the to see it in your gallery. This feature is free now but might be added in the PicsArt gold. So you might have to pay to use this feature.
Red Eye Remover Online
If you are looking for Red-eye remover online, you might not find any reliable solution for this. However, we came up with our photo editing services which offer Red-eye remover services.
Submit your photos using the photo submission form above and make your photo flawless.
We provide the quickest turnaround service.
Contact Us to Remove Red-Eye
How to Remove Red Eye on iPhone?
Step 1: In order to fix red eye, Select the image you want to fix and click “Edit” on top.
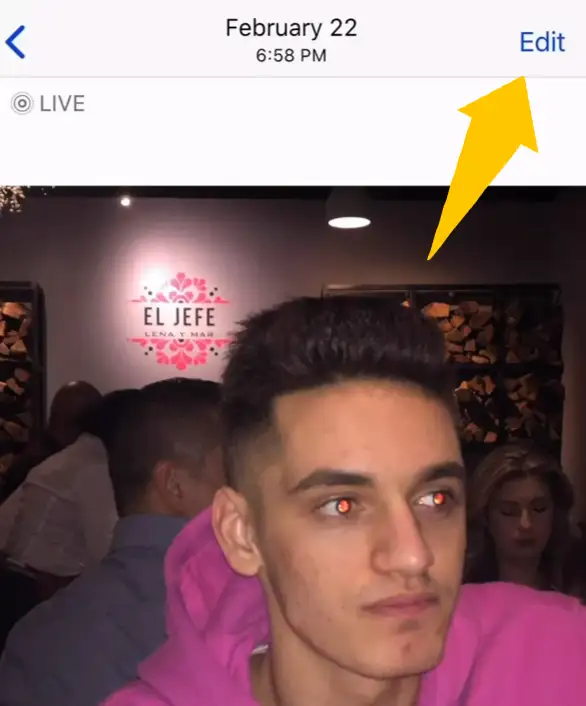
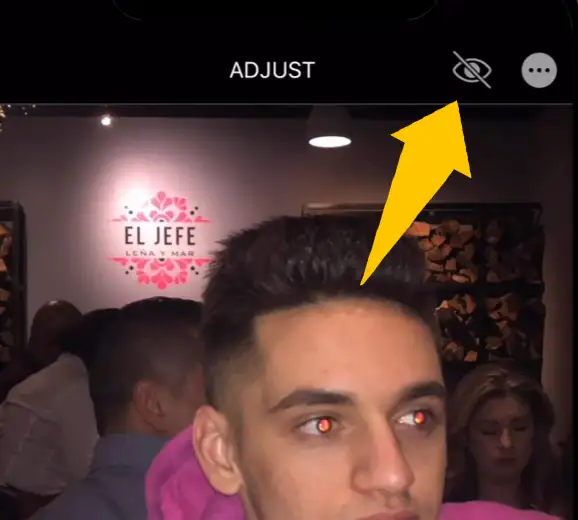
Step 2: In order to fix the red eye under the edit menu, there’s an option on the top.
And that is the eyeball with a line through it.
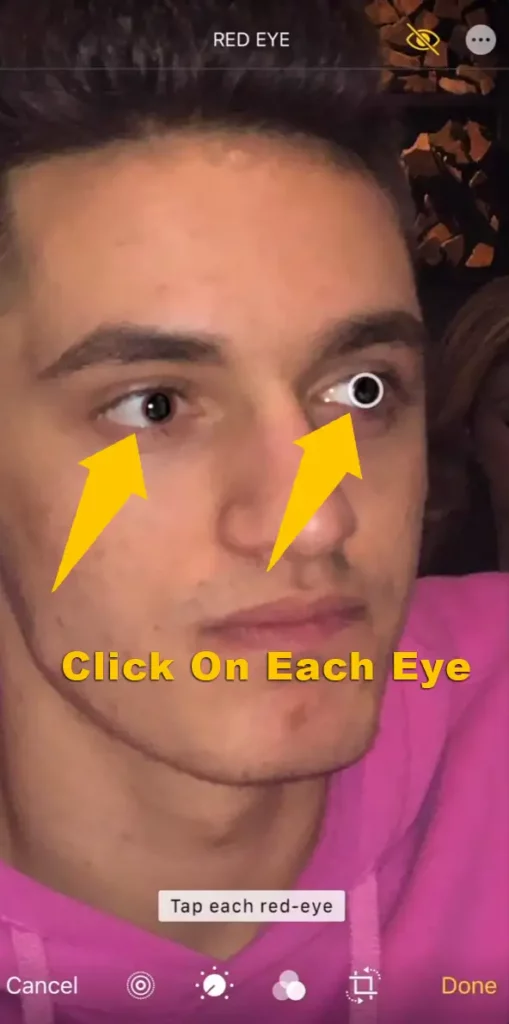
I know a lot of people have never seen that before but if you press that it says to tap each eye to remove red eye.
Step 3: Now zoom into the photo and tap right in the center of that red eye, and then I’ll do it to the other one.
It’s really that simple to remove red eye if you don’t like the result, you can revert your images to the original and then try it again.
It really depends on if you zoom them far enough and tap the right section when you’re removing red eye.
How to Remove Red Eye in Lightroom?
Step 1: Load your image in Lightroom Classic CC and go to develop module.
Step 2: From the toolbar on the right side, select the “red-eye correction” tool.
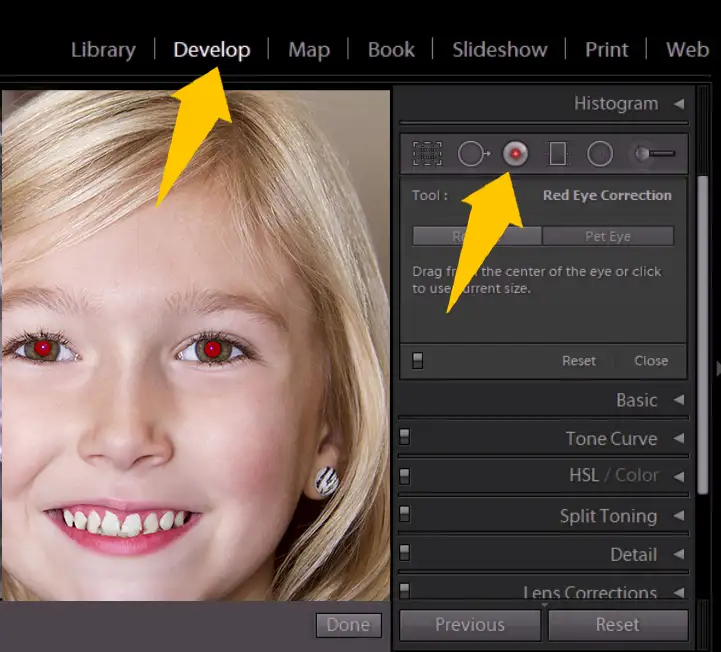
Step 3: The mouse cursor then changes into a correction tool when you hold it over the image area.
Click and drag from the center of the area you want to correct. When you release the mouse button Lightroom defines the correction area and displays additional tools within the tool drawer.
You can adjust the size of the correction area by hovering your mouse pointer over the edge of the circular boundary. when the mouse pointer turns into a double-pointed arrow, you can click and drag to either increase or decrease the size of the correction area.
You can also use the hand tool to move the correction area if needed.
Step 4: When you are satisfied with the corrections, click the done button in the right corner of the image display area to save the changes you made.
How to Remove Red Eye on Samsung s22 Ultra?
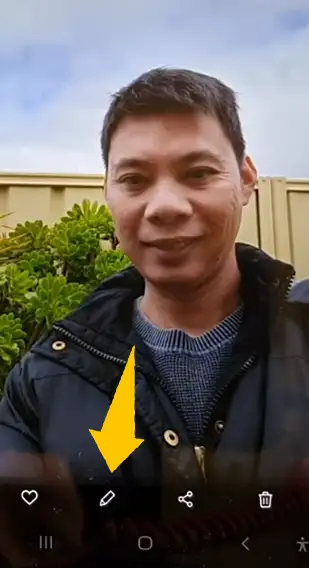
Step 1: To do Red-eye correction in samsung s22 ultra, open the gallery app and select the photo that you want to correct and then tap on the edit button.
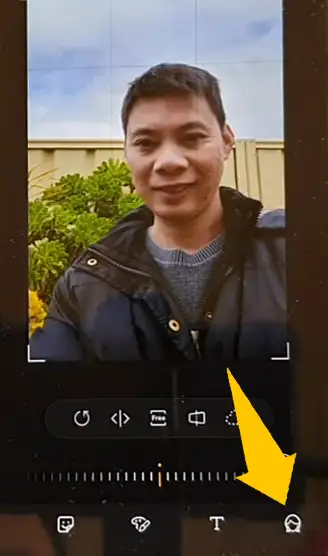
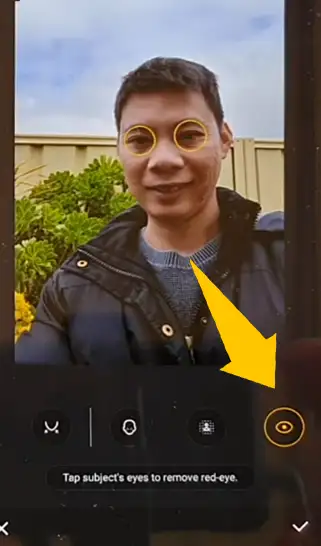
Step 2: Next, go down across the toolbar and tap on the “Portrait Icon”. Then swipe across the sub toolbar and tap on the “Fix Red Eye” option.
Step 3: This will automatically select your eyes and fix the problem. Now click on the “tick icon” and save the image from the top of the screen.
How to Remove Red Eye on Android?
If you are an Android user and want a tutorial to get rid of the red-eye effect in the photo, just follow the steps we have covered above.
I believe there is only one app to do this kind of editing on your phone and that is PicsArt Android App. Scroll up to that part of the tutorial.
Let us recap here for you!
Open your image in PicsArt and then tap on the “Retouch” tool. In the last of the options, you will find an option named “Red-eye”, click on it.
Then you will see two pop-up circles, pinch them one by one to adjust the size and drag to change their position. Once done, hit OK.
That’s simple guys!
The Final Words
We have covered the causes and tips to overcome the red-eye effect from the photos. Also, we have shared the tutorial for fixing the red-eye in photos using Photoshop, PicsArt, and many other techniques.
No matter if you are an Android or IOS user, we have covered both. Just follow these simple steps and apply them to your photos and you will never get your photos ruined by anything.
If you are still finding these steps hard and need an expert hand to do this for you, please don’t hesitate to contact us. Just fill out the form above and will get back to you within a few minutes.
Also, you can check out our recent post to know about how to remove the double chin from the photos.
See you in the next post…


