
Want to whiten teeth in Photoshop? In this blog, we will cover all the methods you need to know to whiten teeth in photos using Photoshop and some alternatives.
This article will be useful for both Photoshop users and mobile app enthusiasts.
If you’re short on time or prefer not to do it yourself, we offer teeth-whitening photo editing services. Our team of Photoshop experts is available to assist you in whitening teeth in your photos.
Let’s dive into the core of this article:
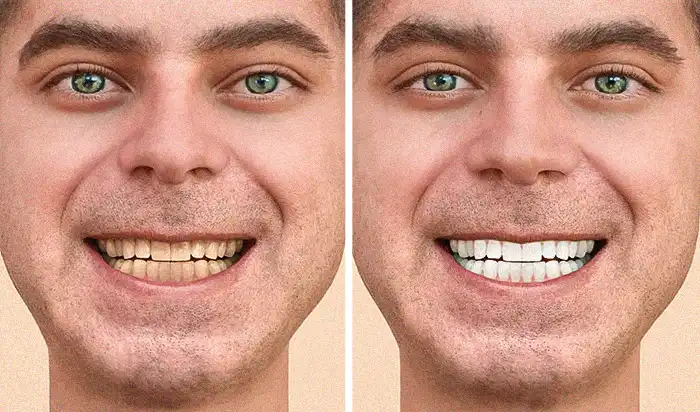
Table of Contents
Why should you whiten teeth in the Images?
Whitening teeth in a photo is a common editing technique used to enhance the overall appearance and create a more visually appealing image. There are several reasons why people choose to whiten their teeth in photos:
Visual Attractiveness: Whitening teeth in photos creates a youthful, attractive look associated with good oral hygiene. A brighter smile enhances the overall appeal of the image.
Boost Confidence: Whitening teeth in photos boosts confidence by reducing self-consciousness about tooth color and flaws. It helps individuals present themselves positively in pictures.
Professional use: Whitening teeth in professional photos is vital for a polished, trustworthy look in corporate headshots, ads, and portfolios. Brighter teeth enhance presentability.
Social media and personal branding: In the age of social media and personal branding, people often strive for their best appearance online.
How to Whiten Teeth in Photoshop – Easy Methods
You will see three easy methods to whiten teeth in Photoshop.
See the quick overview of these three methods.
Dodge Tool Method: Use the “Dodge” tool to selectively lighten the yellow areas on the teeth. This tool brightens the areas you brush over, effectively whitening the teeth.
Hue/Saturation Method: Create a Hue/Saturation adjustment layer and reduce the saturation of the yellow color. This method can help desaturate the yellow tint, making the teeth appear whiter.
Brush and Blend Method: Use a soft white brush on a new layer set to a low opacity, then carefully brush over the yellow areas. Adjust the layer’s opacity to control the level of whitening.
Each of these methods has its advantages and may work differently depending on the specific image and the effect you want to achieve. You can try different methods or even combine them to get the best results.
Remember to work on a separate layer when making adjustments, so you can easily tweak or remove the effect if needed.
Let’s understand each method in detail:
1st Method - Whiten Teeth in Photoshop Using Dodge Tool
We going to have a blast learning how to whiten teeth using the trusty Dodge Tool in Photoshop! 🌟✨
Step 1: Select the right photo: First things first, grab a photo where you want to enhance that million-dollar smile. Whether it’s a selfie, a portrait, or a group shot with friends, make sure those teeth are visible and ready to sparkle.
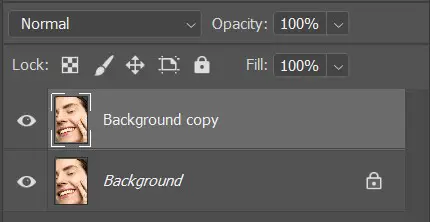
Step 2: Create a copy of the layer: Safety first, folks! Duplicate your photo layer by right-clicking on it and selecting “Duplicate Layer.” This way, we can experiment and reverse any mistakes with ease.
Step 3: The magical Dodge Tool: Now, here comes the fun part! Select the Dodge Tool from your Photoshop toolbox. Make sure the Range is set to “Highlights” and the Exposure is around 30-40% for a natural look.
Step 4: Paint those teeth white: Gently paint over the teeth with the Dodge Tool, being careful not to overdo it. We want a sparkling smile, not glowing teeth from a sci-fi movie!
Step 5: Zoom in for precision: For precise control, zoom in on the teeth to make sure you don’t miss any spots. The devil’s in the details, they say!
Step 6: Undo is your best friend: No worries! Just hit that magical “Undo” button or press Ctrl/Cmd+Z to reverse any mishaps.
Step 7: Embrace subtlety: Remember, less is more! Aim for a natural-looking enhancement that brightens the teeth while keeping them looking authentic.
Step 8: Compare before and after: Once you’re done, take a step back and compare the original and your edited version. You’ll be amazed at how a simple trick can bring out the best in your smile!
Step 9: Flatten and save: Once you’re satisfied with your masterpiece, flatten the image and save it.
2nd Method - Whiten Teeth in Photoshop Using Hue/Saturation Layer
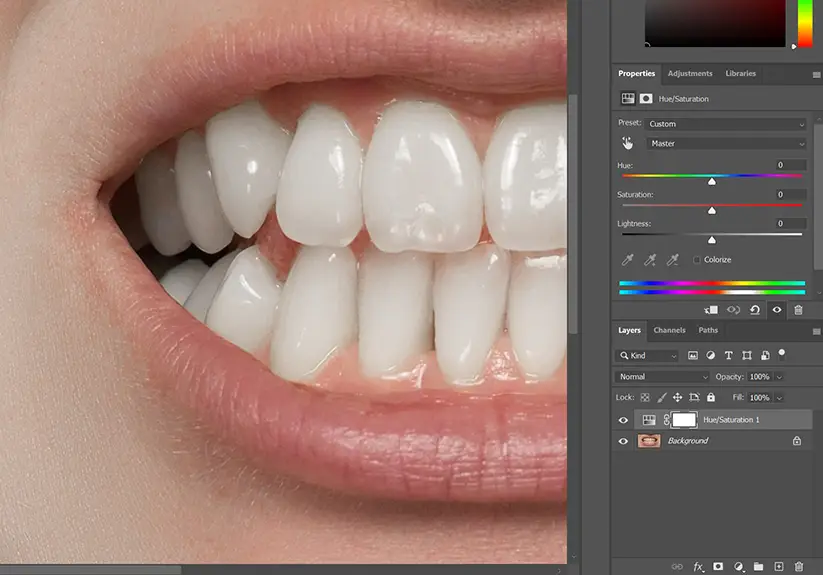
Step 1: To get started, simply open the image in Photoshop and proceed by clicking on the adjustment layer icon.
From there, select the hue/saturation layer option to make the necessary adjustments.
Step 2: Please choose the yellow color from the dropdown menu, reduce the saturation, and raise the lightness.
If there is a yellow object in the image, you may notice that its saturation has also decreased.
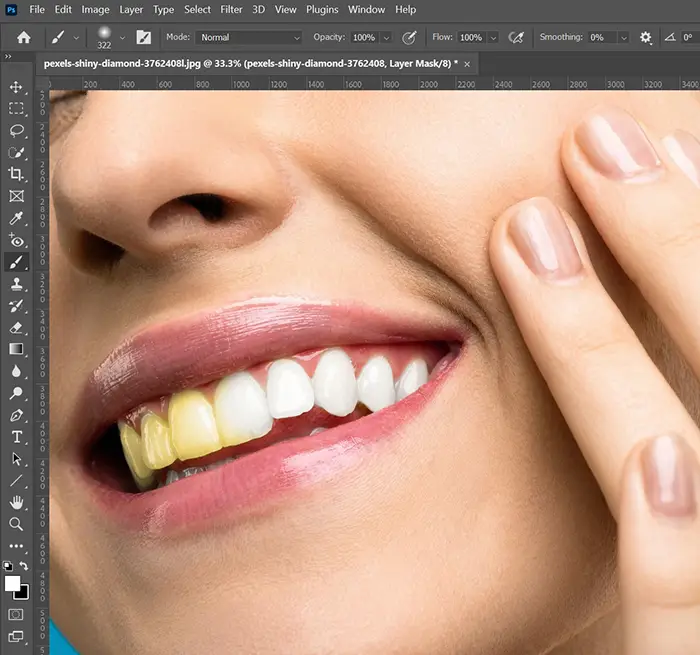
It’s affecting the skin as well. So, we will only apply this setting on the teeth.
Step 3: To get started, select the mask and use the shortcut [ctrl + I or command +I] to invert it. Next, ensure that the brush is selected and that the foreground color is set to white. You can now start painting on the teeth.
Step 4: Once you have finished the task, be sure to save any changes you have made or make further edits as needed.
Now, let’s see the next method.
3rd Method - Whiten Teeth in Photoshop Using Brush and Blend Method
Let’s see the third method for whitening teeth in Photoshop.
Step 1: Open your photo and zoom in
Drag and drop the pic in Photoshop you want to work on and zoom in to get a clear view of those pearly whites!
Step 2: Select the Brush tool and set the hardness to 0
Find the Brush tool and set its hardness to 0% for smooth and seamless brushing.
Step 3: Pick a white color and paint over the teeth
Take a bright white color and gently paint over the teeth—like an artist creating a masterpiece!
Step 4: Lower brush opacity for a natural look
Reduce the brush opacity (around 30-50%) to avoid the “Chiclet teeth” effect and keep it looking real.
Step 5: Blend and refine as needed
Use the Eraser tool or adjust the layer opacity to fine-tune the effect, and voilà—your dazzling smiles are ready to shine!
How to Whiten Teeth in PicsArt
To whiten teeth using the PicsArt mobile app, simply follow the steps outlined below.
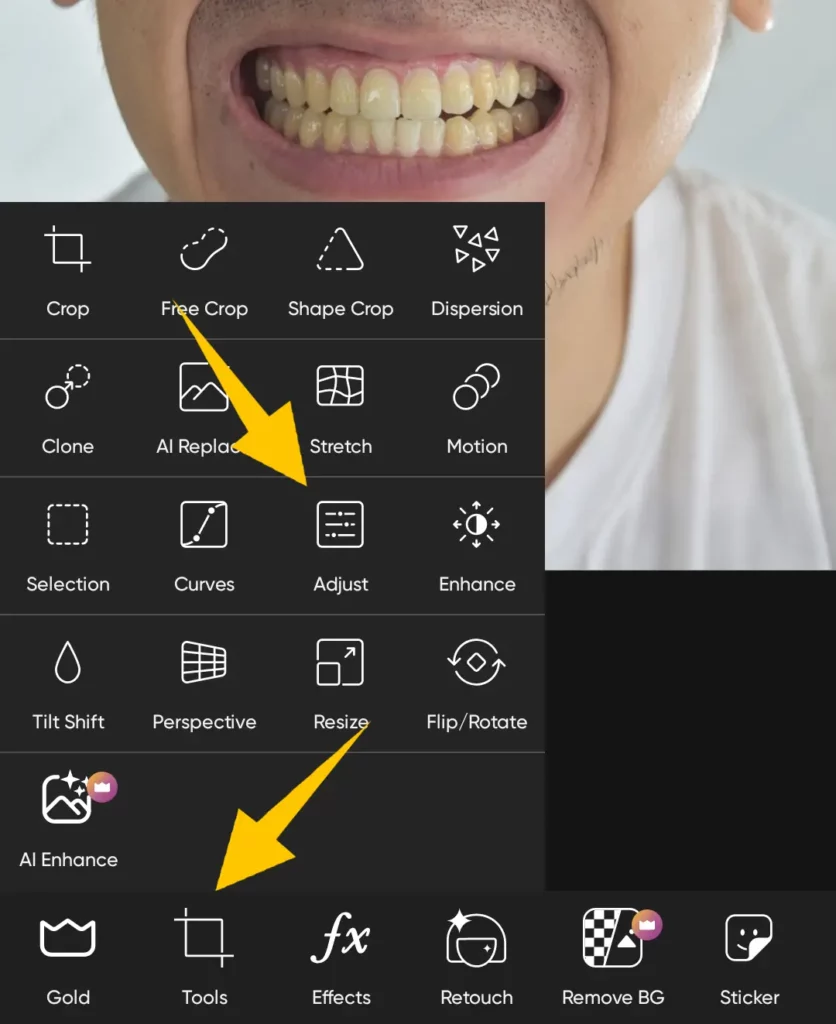
Step 1: To adjust the image, first open it in the PicsArt app. Then, navigate to the “tools” section and select the “adjust” tool.
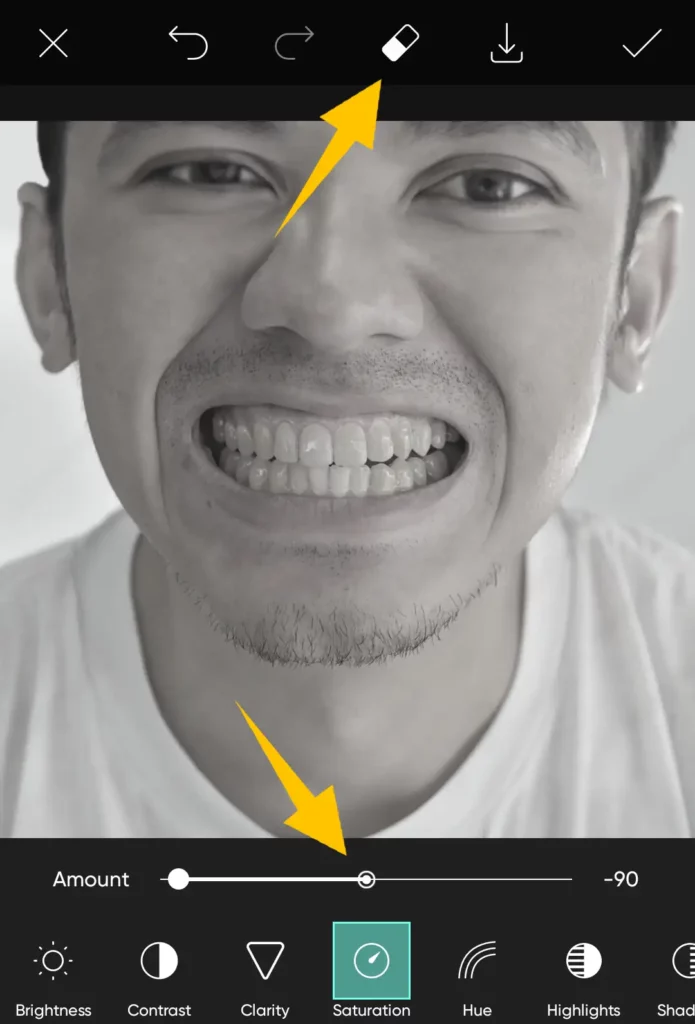
Step 2: It would be best to decrease the saturation to -100.
Step 3: From the top, go to the eraser tool and tap on the invert option.
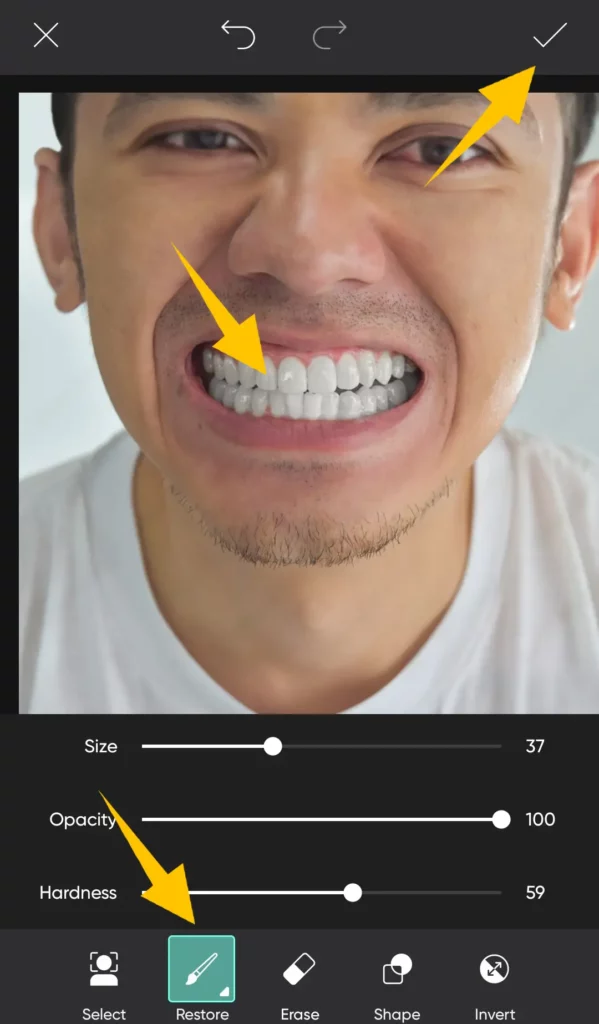
Step 4: For carrying out the task, kindly make use of the restore brush and decrease its size accordingly. It is recommended to maintain the brush’s hardness level around 95% for optimum results.
Step 5: To paint the yellow teeth, use a slow and steady hand, ensuring to be meticulous.
If you accidentally paint outside the teeth while using this application, don’t panic. Just click on the undo option at the top of the screen to correct it.
Once you have removed any yellow discoloration from the teeth, save the image on your phone for future reference.
How to Whiten Teeth in Photos Snapseed
If you want to whiten your teeth in the Snapseed app then follow the steps below to learn the easiest way.
- Open the Snapseed app and load the image you want to edit.
- Tap on the “Tune Image” tool, represented by a pencil icon, to access the editing options.
- Adjust the brightness and contrast sliders to enhance the overall appearance of the image.
- If the teeth appear yellowish, you can try adjusting the “Saturation” slider to reduce the yellow tint.
- Use the “Selective” tool (represented by a “+” icon) to selectively brighten the teeth area. Tap on the teeth, and then adjust the brightness slider upward.
- You can also use the “Brush” tool (represented by a brush icon) to further refine the teeth whitening by brushing over the teeth area with increased exposure or brightness.
- Once you are satisfied with the edits, save the image
How to Whiten Teeth in Photos on iPhone?
Again we are going to use the PicsArt app to whiten teeth on iPhone. Download the app on your iPhone and follow the steps we have mentioned above.
Frequently Asked Questions (FAQs)
How to whiten teeth in Photoshop?
Follow the precise and expert tips, in a nutshell, to whiten teeth in Photoshop.
- Open your image in Photoshop and create a duplicate layer to preserve the original.
- To precisely choose the area surrounding the teeth, use the right selection tool, such as the Lasso Tool or Quick Selection Tool.
- Utilize the Refine Edge Tool to further refine the selection to obtain the teeth’s exact contours.
- Now, alter the brightness and contrast of the selected teeth. You can accomplish this by employing adjustment layers or the Dodge Tool.
- Fine-tune the results to get a natural, realistic appearance. Keep an eye out for details and avoid over-whitening.
- When you’re happy with the whitening effect, save the altered image in a non-destructive format (for example, PSD) and export it for online or print use.
How can I edit my teeth in a picture?
Consider taking help from the expert photo editors.
- Submit Your Photo: Send us the picture you want to improve, and our expert photo editors will handle the rest.
- Teeth Whitening: We’ll use advanced editing techniques to whiten your teeth naturally, ensuring they look bright and healthy without appearing unnaturally white.
- Teeth Straightening: If your teeth need alignment adjustments, we’ll skillfully straighten them, enhancing the overall symmetry of your smile.
- Teeth Reshaping: Whether you desire subtle adjustments or more significant changes, we can reshape your teeth to complement your facial features and create a stunning smile.
- Natural Look Guarantee: Our skilled editors prioritize a natural appearance, ensuring that your smile looks authentic and not overly edited.
- High-Quality Delivery: We deliver the final edited image in your preferred format, ready to be shared on social media, used in professional settings, or cherished as a beautiful memory.
Alternative Options to whiten teeth in Photoshop
Here are few alternative options other than editing to whiten teeth in pictures:
- Adobe Photoshop: If you prefer to edit the teeth yourself, you can use Adobe Photoshop, a powerful image editing software. Follow the steps outlined in our guide above for teeth editing.
- Free Online Editors: Various free online photo editing tools like Pixlr, Canva, or GIMP offer basic teeth editing features. However, keep in mind that the results may not be as precise as those achieved by professional editing services.
- Mobile Apps: Several mobile apps like Snapseed or Facetune provide teeth whitening and editing options for quick touch-ups on the go.
How Can I Whiten My Teeth in Pictures for Free Online?
There are various free options available online for teeth whitening, but it’s important to keep in mind that these options may have their limitations.
They could potentially cause discoloration to your skin or other objects in the photo.
It’s recommended to use a photo editor that can assist you in whitening your teeth in pictures.
Best Natural Ways to Teeth Whitening?
Consider using these tips to whiten your teeth at home:
- Use teeth whitening toothpaste or apply gel.
- You can try an electric brush for precise cleaning.
- Take a little bit of sand and rub your teeth with it.
- You also apply teeth whitening gel for instant results.
- Consult a dentist for a permanent solution.
Best Teeth Whitening App?
There are various applications available for whitening teeth in pictures such as Adobe Photoshop Fix, Snapseed, and PicsArt.
From my experience, PicsArt offers the most comprehensive color and brush control, making it the best option.
Summarize
You have learned to whiten the teeth in Photoshop as well as in the mobile apps. If you will implement this correctly, you will be going to see amazing results.
No matter which method you are going to use, if you follow the basics, you will be able to do it.
Still, finding it difficult? You can contact us to whiten your teeth in photos.
See you in the next post…


