
After doing a perfect photo session you put the photos into your computer and it looks like the skin tone is a bit pale. Now you are looking for a tutorial to change skin tone in the photos.
If yes, then you are at the right website.
In this tutorial, you are going to see how to change skin tone color for free.
Today, you are going to see about: –
How to change skin tone in Photoshop using many methods?
How to change skin tone in PicsArt?
How to change skin tone Online?
Table of Contents
Why do you need to fix the skin tone in the photos?
Let’s consider a situation where you’ve been hired by a client to conduct a memorable photo session, and you’ve taken multiple photos for them.
As you begin editing the pictures, you notice that the skin tone has been altered and appears washed out.
In such a scenario, ensuring the skin tone is accurately adjusted before submitting the photographs to your client is essential.
This practice will not only help you avoid any potential disappointment on the part of the client but also contribute to a more satisfactory outcome for all parties involved.
How to change skin tone in Photoshop?
We are going to show three methods to fix skin tone in Photoshop. All are simple and easy to follow.
Method: 1 - Fix Skin Tone in Photoshop Using Curves
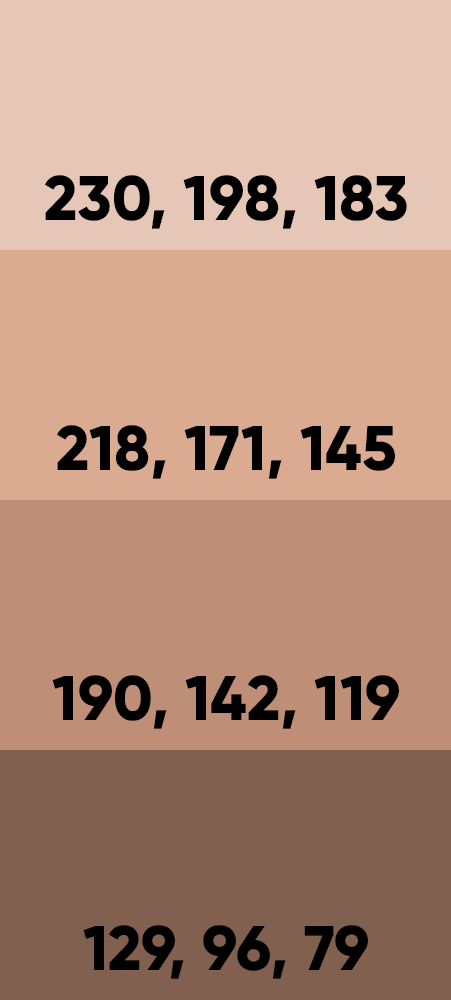
In the first method, we will use a color palette to match the color of our image with it. If you want to download the color palette, you can use our link or just download it from any website.
Also, you will find this color palette on Adobe’s website.
Before starting keep in mind there is no such thing as the perfect skin tone. The skin color palette that I gave you is to be used as a starting point. This is not only for the perfect skin tone but this has to be used as a starting point.
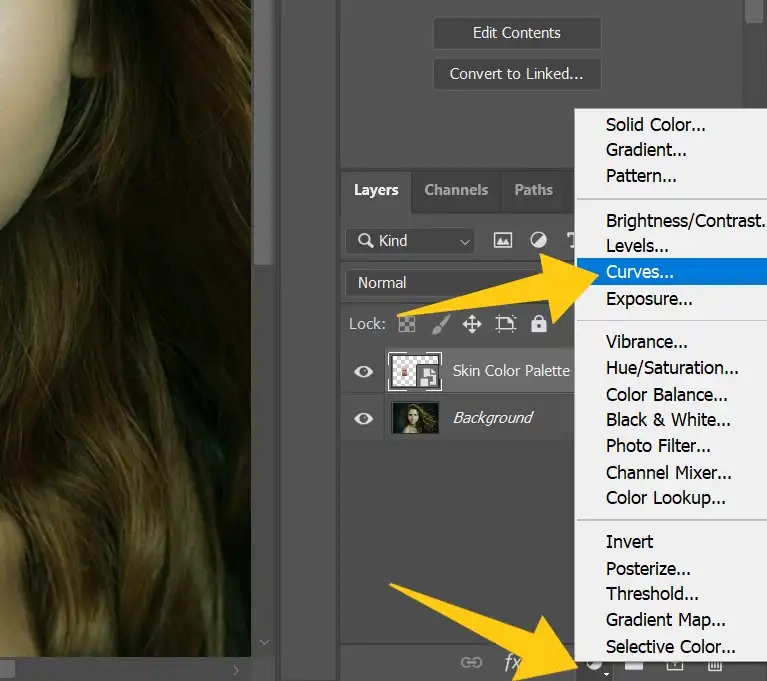
Step 1: Open your image in Photoshop and drag & drop the color palette over it. Make sure it should be on a separate layer so we can delete it later.
You will find four color palettes in the image; you have to choose according to your image. In my case, I will go with the second one.
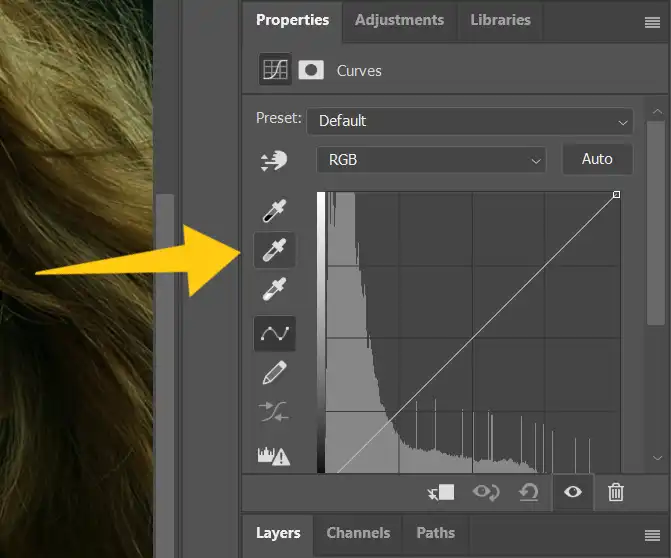
Step 2: Click on the adjustment layer icon and then choose curves. Make sure the curve symbol is selected. Now, double-click on the middle eyedropper tool and sample the color from the “color palette”.
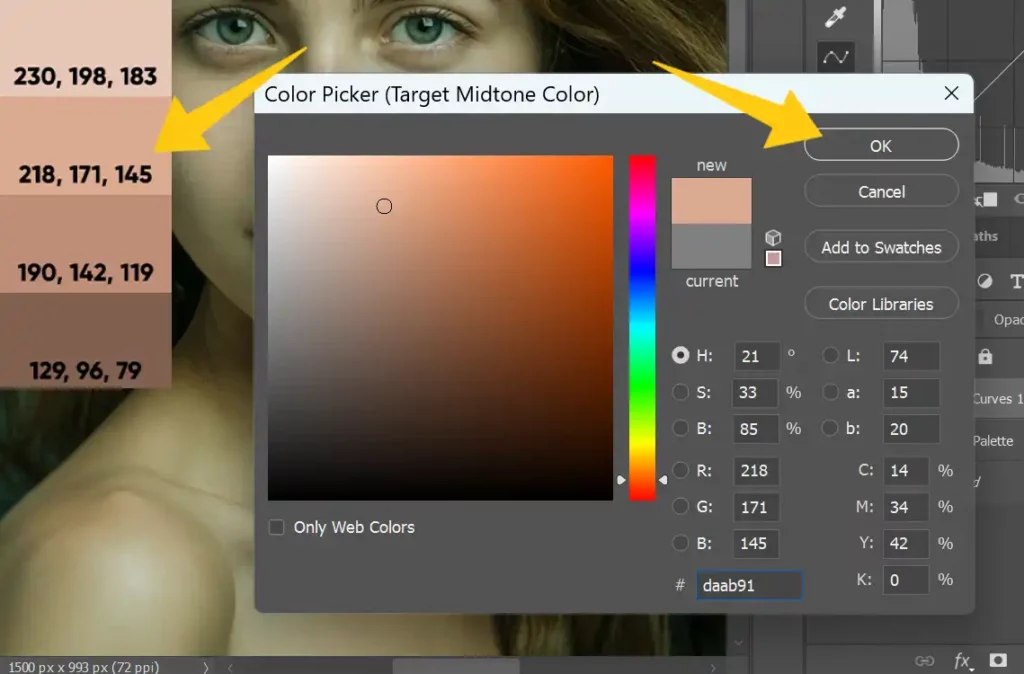
Step 3: Now click on the mid-tone of the skin. But it will look too saturated, right? It is just not working out. So, we will double-click on the middle eyedropper tool and decrease the saturation.

Step 4: Now try once again, just select the middle eyedropper tool and tap on the mid-tone area of the skin.
Now delete the color palette layer and save the image.
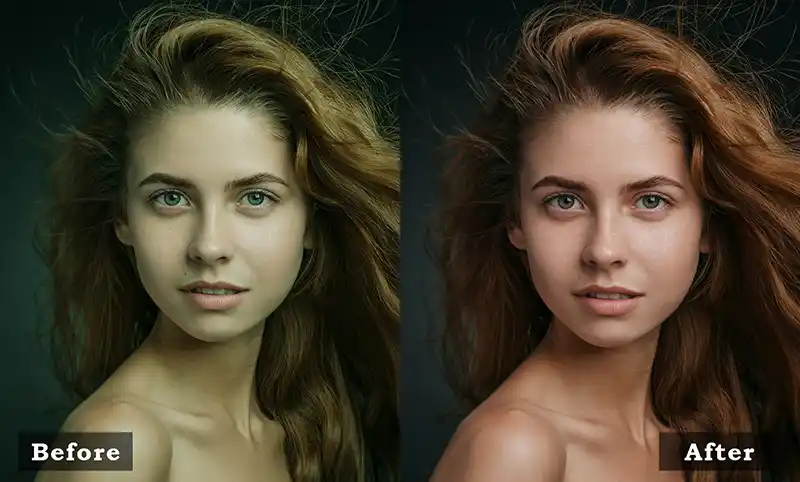
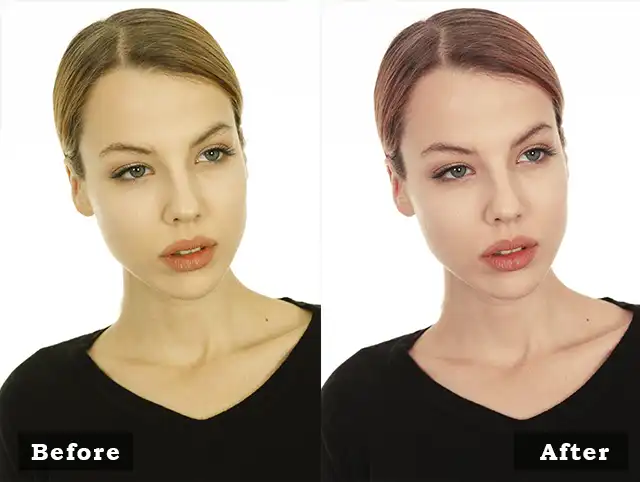
And boom! You will see a massive difference between the before and the after image as you can see below.
This was the first method of fixing skin color in Photoshop.
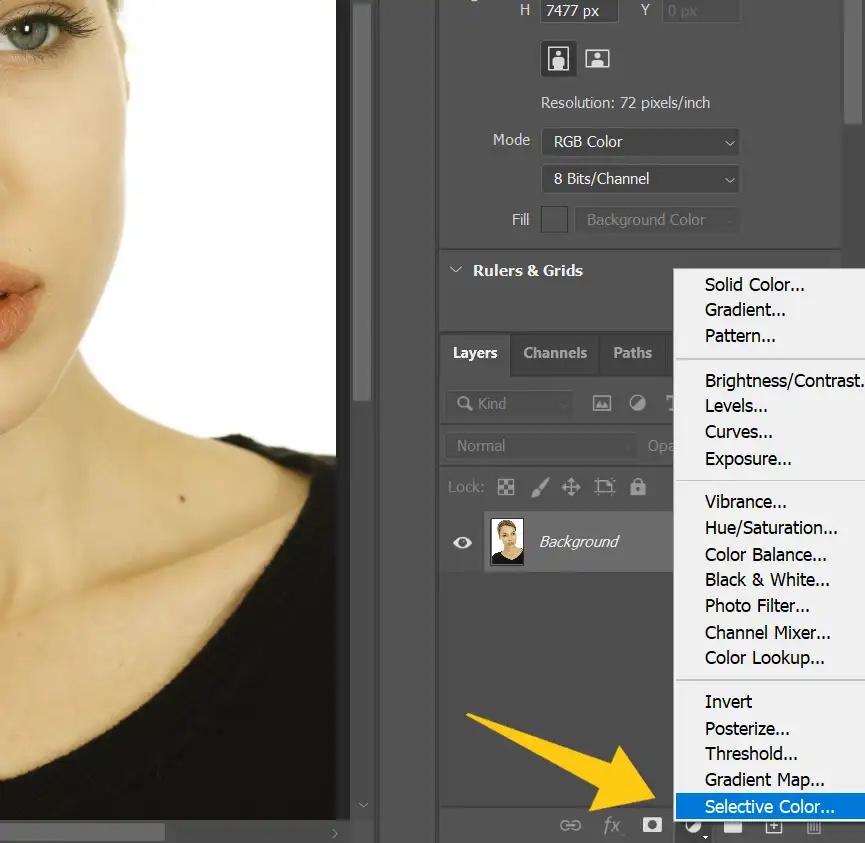
Method: 2 – Fix Skin Tone in Photoshop Using Selective Color
In this method, we will use the selective color layer and target the selective color in the photo to fix it.
Step 1: Click on the adjustment layer icon and choose “selective color”.
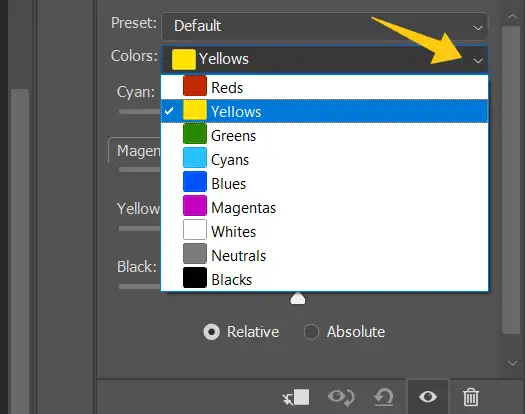
Step 2: Target the color that you want to fix in your image. In my case, the skin looks too yellowish. So, I will target yellow color. After selecting the yellow, simply I will decrease the yellow color and add a little bit of magenta.
As we all know “Cyan” is the opposite of “Red” color. CMY is the opposite of RGB. So, we will decrease the cyan to add a little bit of red.
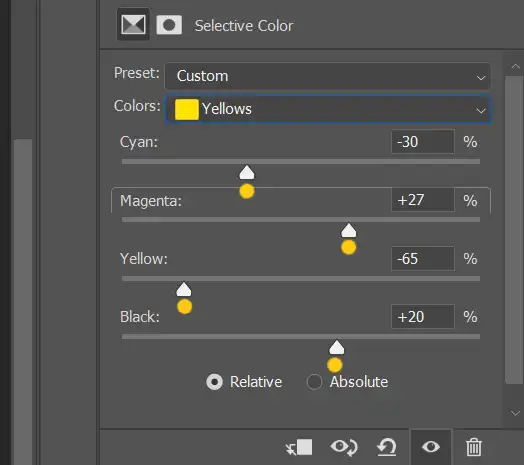
Pro tip: Make the image a little darker by adding black to it. Make sure the “relative” is checked.
So this is how you can fix the skin tone using selective color in just a few minutes.
Have a look at the result! I would say nothing but Awesome…
Method: 3 – Enhance Skin Tone Using Camera Raw Filter
Step 1: Open your image in Photoshop and go to the camera raw filter.

Step 2: Grab the eye dropper tool and tap on the area that should be white or grey in real life. Or find something greyish area and tap on it.
Here you go, it is the fastest method as the speed of the light. It will save you most of the time and give fantastic results.
Method: 4 – Fix Skin Tone Using Auto Options in Curve
Step 1: Open the adjustment layer icon and choose curves.
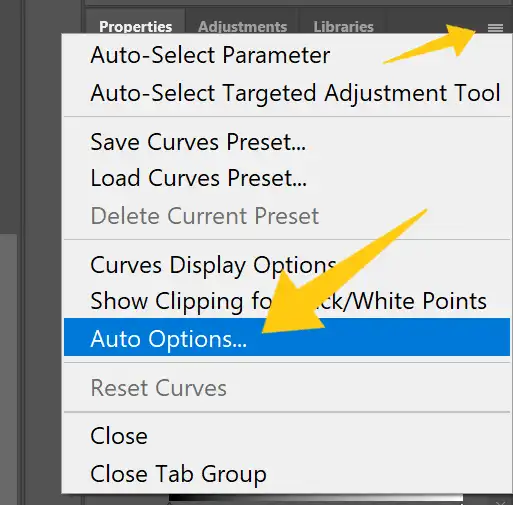
Step 2: Then click on the toggle on the right side.
Step 3: Select “Auto Options” from the dropdown options.
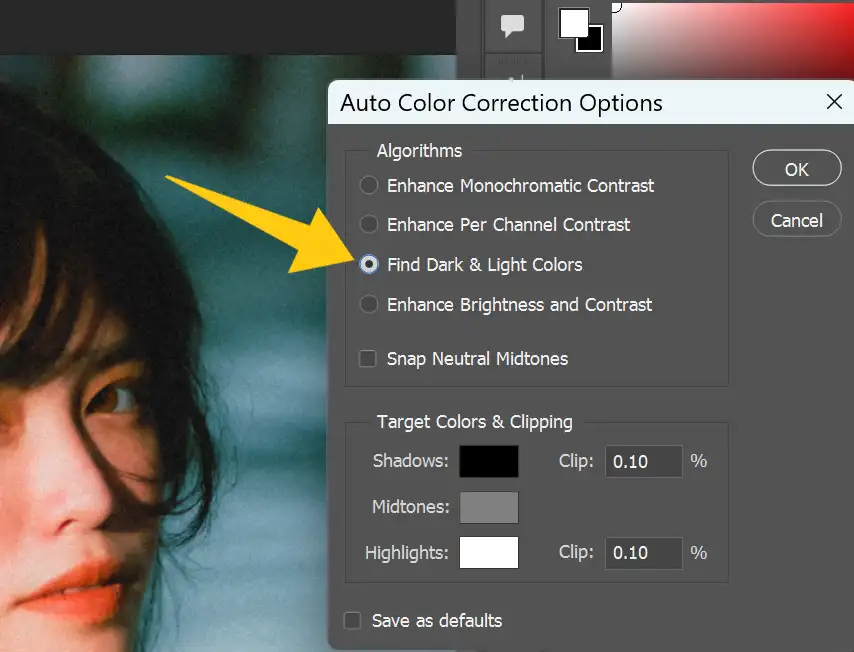
Step 4: Under algorithms you will find few adjustment presets. You can check all of them to find the best one for you.
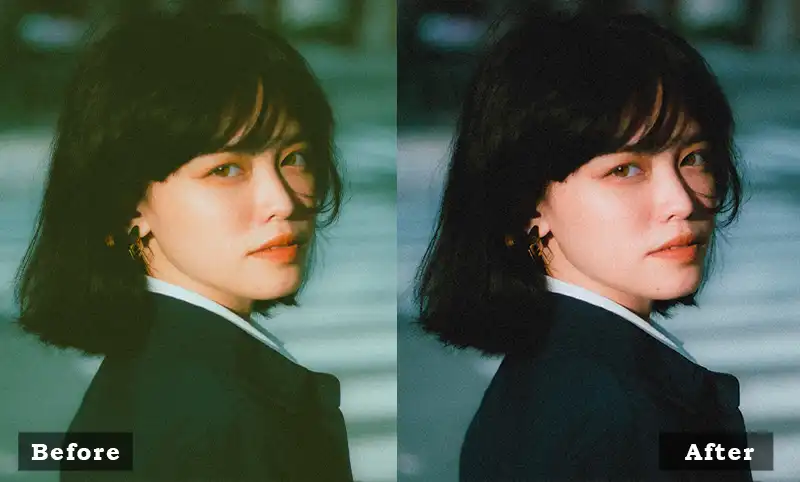
Done! See the before and after image above of the result of this method.
Contact Us to Fix Skin Tone
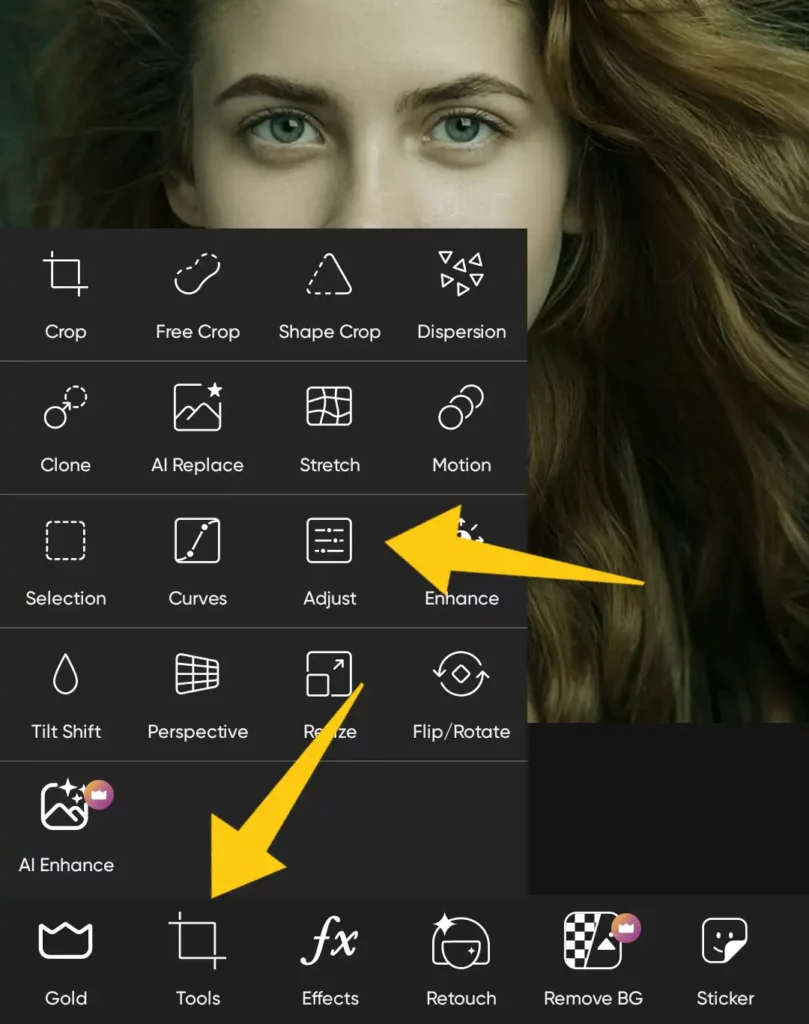
How to Change Skin Tone in PicsArt?
Go to the PicsArt image editor app and load the image in it.
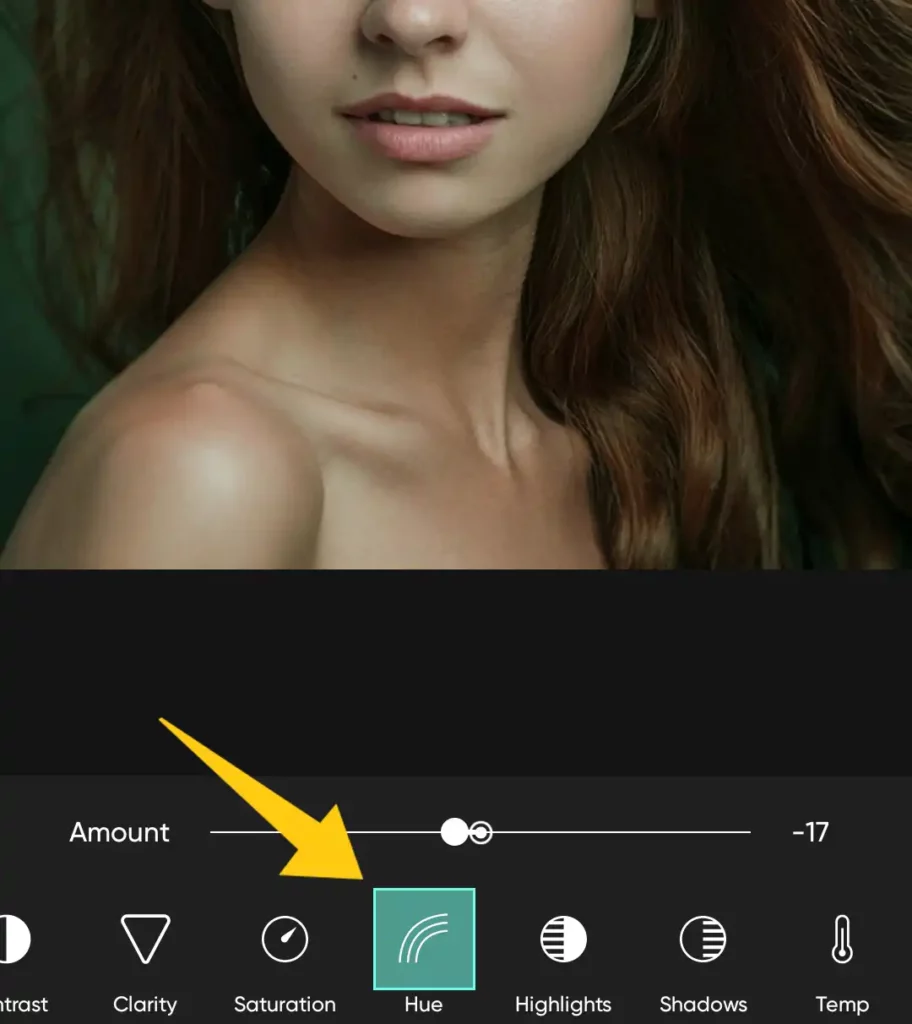
Step 1: Open the tools panels and select adjust tool. Decrease the hue to something around -17.
Step 2: Increase the temperature a little bit to remove the color cast and improve the skin tone. We will increase it to +25.
How to Fix Skin Tone in Lightroom?
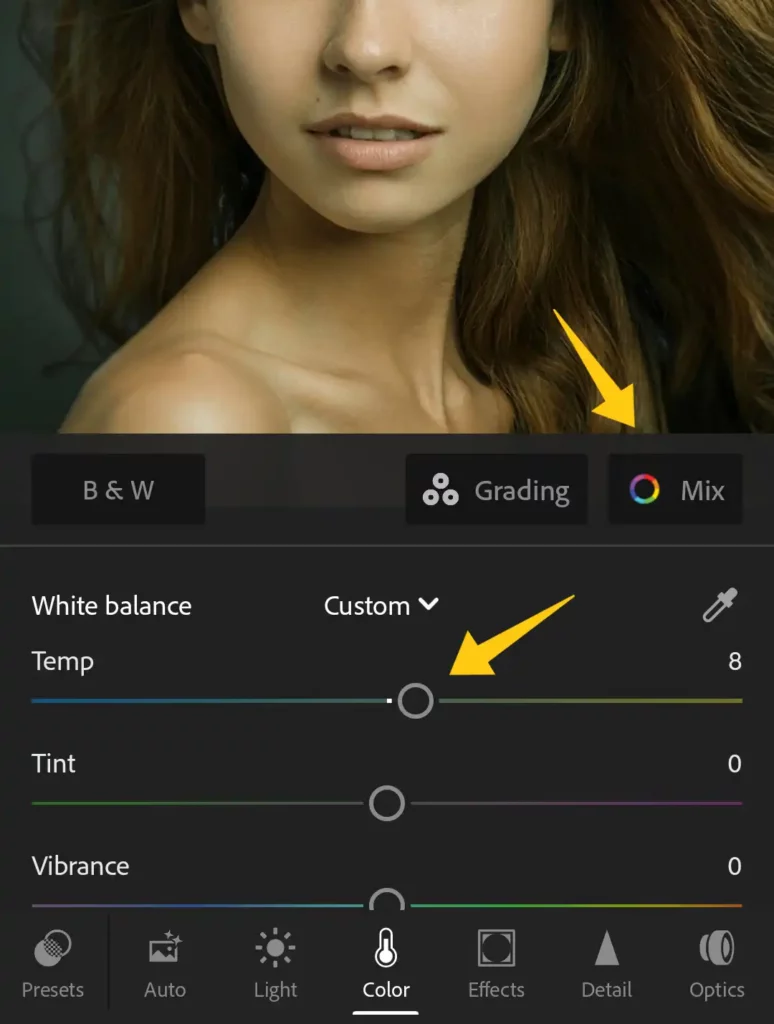
Add the image in Lightroom mobile and open up to edit.
Step 1: Go to color tab and increase the temperature something around +10. Also increase the tint around +5.
Step 2: Then go to color mix tab and decrease the saturation of color cast. You have to find which color is effect more to your photo.
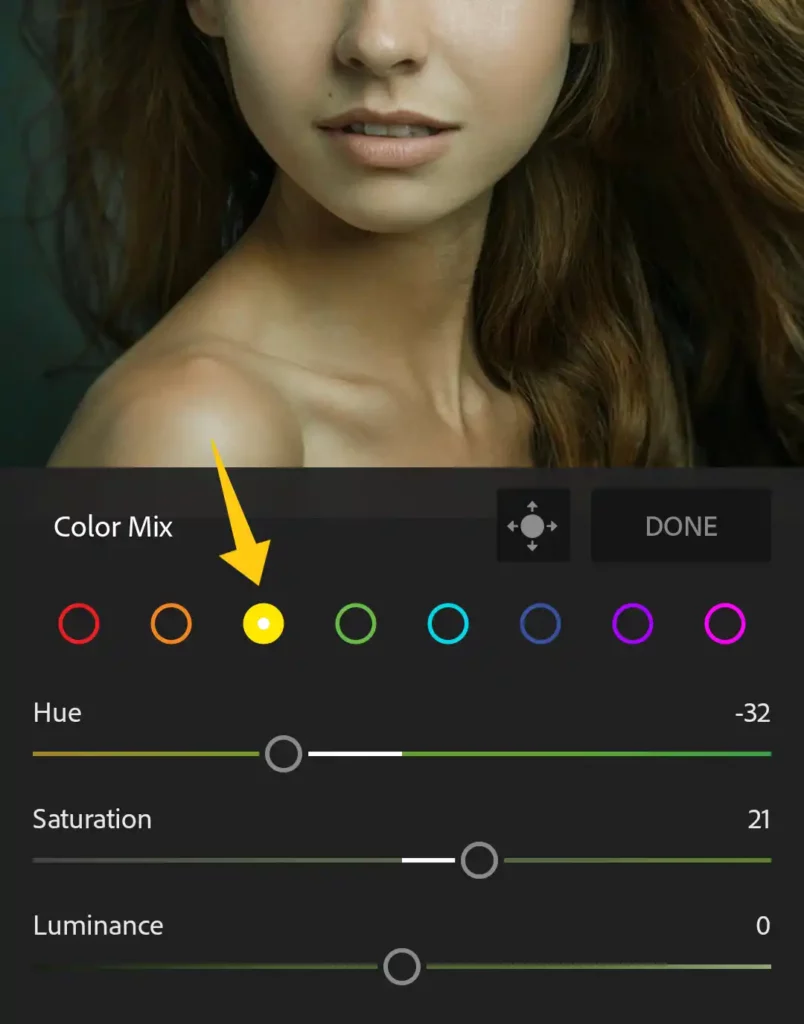
Step 3: After that, select the orange color and play with the hue. Find a point where the skin tone looks fine to you.
Hurray, we have covered all the methods to fix skin tone in the photo.
How to Change Skin Color Online?
Changing skin color online has never been easier with our professional photo editing services. If you’re looking to modify the skin tone in your photos, follow these simple steps to achieve remarkable results.
First, visit our website and navigate to our photo editing service. Upload the image you want to modify and specify your desired skin color. Our team of skilled photo editors will take care of the rest.
Using advanced techniques and industry-leading software, we will meticulously adjust the skin tone while preserving the overall natural appearance of the subject.
You can choose to lighten, darken, or even completely transform the skin color to your liking. Once the editing process is complete, we will send you the revised image, ensuring fast and secure delivery.
Don’t let imperfections hold you back from showcasing your best self. Take advantage of our online photo editing services and transform your photos with the perfect skin color that suits your vision.
The Final Words
In this tutorial, we have learned to fix the skin tone using Photoshop and mobile apps. If you will follow all the steps, you will be able to get rid of the washed-out skin tone in the images. Always keep in mind that the values we used to balance the color might not work with your images. But this will give you a point to start with.
However, if you want professional photo editors to do this, you can always hire us.
Also, we provide all types of photo editing services to help you with. So, fill out the above form to get a quote from our side.


